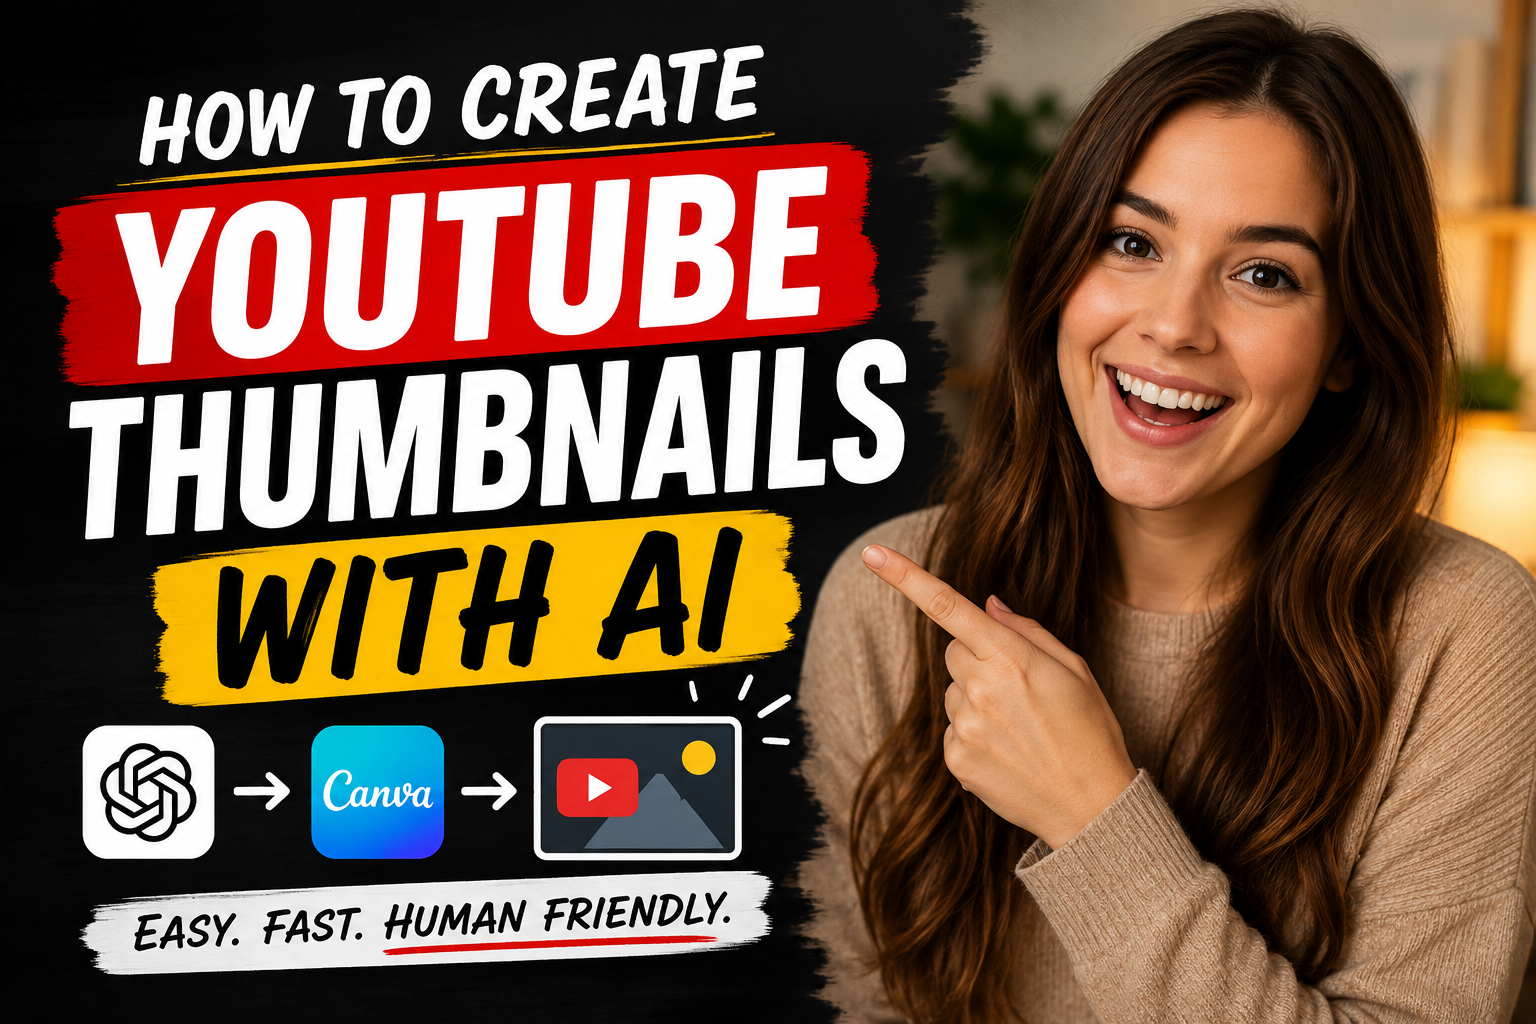
Your thumbnail is the first thing people see on YouTube — and iecides whether they click or scroll past. The good news? You don’t need Photoshop or any design experience. With AI tools, anyone can make a professional, click-worthy thumbnail in under 10 minutes. This guide shows you exactly how.
Why Thumbnails Matter More Than You Think
YouTube’s own research shows that 9 out of 10 of the most-watched videos on the platform use a custom thumbnail. That’s not a coincidence. A great thumbnail can double or even triple your click-through rate (CTR) — meaning more views without making a single extra video.
Think about how you use YouTube. You scroll through dozens of thumbnails before clicking anything. If yours doesn’t grab attention in under a second, viewers move on. It doesn’t matter how great your video is if no one clicks on it.
AI tools have made this easier than ever. You don’t need a graphic designer. You don’t need Canva skills. You just need a good idea and the right tool.
What Makes a Great YouTube Thumbnail
Before we jump into the tools, let’s talk about what actually works. The best thumbnails share a few things in common:
One clear focal point — Your eye should land on one thing immediately. A face, a product, a bold number. Too much going on = no clicks.
Bold, readable text — If you add text, it should be readable even when the thumbnail is tiny (like on a phone screen). 3–5 words max. Big font. High contrast.
Strong contrast — Bright colors against dark backgrounds (or vice versa) pop out. Flat, dull colors get ignored.
Emotion or curiosity — Thumbnails that show a surprised face, a dramatic “before and after,” or a number like “$10,000” make people want to know more.
Consistent branding — Once you get going, your thumbnails should look like they belong to the same channel. Same colors, same style, same font.
Best Free AI Tools for Creating YouTube Thumbnails
There are several great options depending on what you need. Here are the top picks for beginners:
Canva AI — Drag-and-drop editor with a built-in AI image generator. Best for adding text, layouts, and quick edits. Great starter tool. Free plan available.
Adobe Firefly — Adobe’s AI image generator. Produces high-quality, photorealistic visuals. Works well for background images and bold scenes. Free credits included.
Microsoft Designer — Powered by DALL·E. Completely free, easy to use, and produces polished thumbnails with minimal effort. Great for beginners. 100% free.
Thumbnail AI — Built specifically for YouTube thumbnails. Lets you generate and test designs quickly. Designed for creators, not designers. Free trial available.
For this tutorial, we’ll use Canva AI + Microsoft Designer together — one to generate the image, one to add text and polish. Both are free.
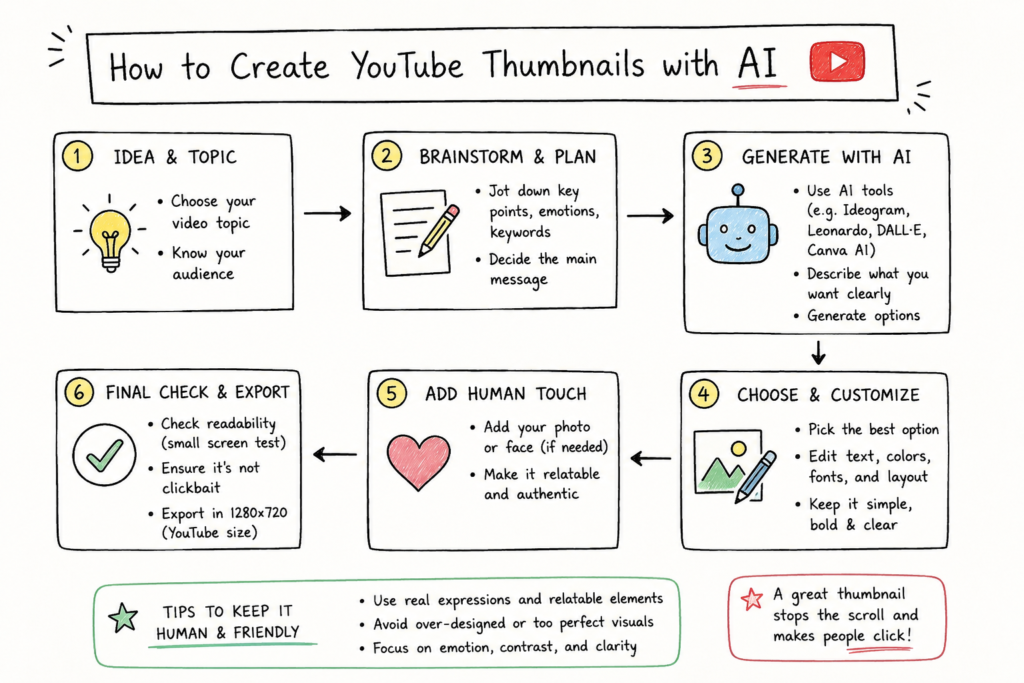
Step-by-Step: How to Create Your First AI Thumbnail
Step 1 — Know your video’s main hook
Before opening any tool, ask yourself: what is the ONE thing my video promises? Write it down in 4–6 words. This becomes your thumbnail text and your AI prompt. Example: for a video about losing weight fast, your hook might be “Lost 10 lbs in 30 days.”
Step 2 — Go to Microsoft Designer (designer.microsoft.com)
Open your browser and go to designer.microsoft.com. Sign in with a free Microsoft account. Click “Image Creator” from the main menu. This is where you’ll generate your background image using AI.
Step 3 — Write your AI image prompt
In the text box, type a description of the image you want. Be specific — the more detail, the better. You’re not just saying “make a thumbnail,” you’re describing a scene.
Example prompt — fitness channel:
“A fit person standing confidently in a gym, dramatic lighting, bold red and black color scheme, high contrast, cinematic style, YouTube thumbnail style”
Example prompt — tech/tutorial channel:
“A glowing laptop on a dark desk with floating digital icons around it, blue and white color scheme, clean modern style, dramatic lighting, wide shot”
Example prompt — food/cooking channel:
“A delicious golden brown pizza straight from the oven, steam rising, dark rustic background, warm orange tones, close-up food photography style”
Step 4 — Generate and pick the best image
Click Generate. Microsoft Designer will show you 4 image options. Pick the one that looks most eye-catching. Don’t overthink it — go with your gut. Download the image to your computer.
Step 5 — Open Canva and set the thumbnail size
Go to canva.com and click “Create a design.” Search for “YouTube Thumbnail” in the size options — it will set the canvas to the correct 1280×720 pixels automatically. This is the exact size YouTube recommends.
Step 6 — Upload your AI image to Canva
In Canva, click “Uploads” on the left sidebar and upload the image you downloaded from Microsoft Designer. Drag it onto your canvas and resize it to fill the whole background.
Step 7 — Add bold, punchy text
Click “Text” and add a text box. Type your hook (the 4–6 word phrase from Step 1). Make the font large, bold, and easy to read. Use a contrasting color — white text on dark backgrounds works almost every time. Keep it to one or two lines max.
Step 8 — Download and upload to YouTube
Click the Download button in Canva (top right). Choose PNG format for the best quality. Then go to YouTube Studio, open your video, and upload it as the custom thumbnail under “Thumbnail” in the video details section.
How to Write the Perfect AI Prompt for Thumbnails
The prompt is everything. A weak prompt gives you a generic, forgettable image. A strong prompt gives you something that looks like a professional designer made it.
Prompt formula:
[Subject] + [Action or mood] + [Color scheme] + [Lighting style] + [Visual style] + “YouTube thumbnail”
Useful keywords to mix into your prompts: dramatic lighting, cinematic style, high contrast, photorealistic, bold colors, dark background, wide shot, close-up, neon accents, minimalist, explosion effect, golden hour lighting.
Pro Tips to Get More Clicks
1. Use a face whenever possible Thumbnails with human faces — especially showing strong emotion like surprise, happiness, or shock — consistently outperform text-only thumbnails. Even a stock-style AI face works better than no face at all.
2. Test your thumbnail at small size Shrink it down to 120×68 pixels on your screen. If you can’t read the text or understand the image at that size, viewers on mobile won’t either. Simplify until it’s crystal clear at any size.
3. Match the thumbnail to the title Your thumbnail and video title should work together, not repeat each other. If your title says “I tried the viral 10-minute workout,” your thumbnail doesn’t need that same text — it should show the result or emotion instead.
4. Create 2–3 versions and A/B test YouTube lets you test different thumbnails over time. Make two or three variations and swap them out every few weeks to see which one gets a higher CTR. Even small changes (different text, different color) can make a big difference.
5. Stay consistent with your channel style Pick a color palette and stick to it across all your thumbnails. Viewers who’ve seen your videos before will recognize your content instantly while scrolling. This builds trust and makes them more likely to click.
What to Avoid
Avoid clickbait. Don’t promise something in the thumbnail that your video doesn’t deliver. YouTube tracks viewer satisfaction — if people click and leave quickly, your video gets pushed down in recommendations.
Too much text — More than 5–6 words on a thumbnail gets hard to read. Keep it short and punchy.
Busy, cluttered backgrounds — An AI image with too many elements makes it hard for the eye to focus. Simple, clean backgrounds work best.
Wrong file format or size — YouTube requires thumbnails to be under 2MB. PNG or JPG both work. Always use the 1280×720 pixel canvas size in Canva.
Ignoring your niche style — Look at the top channels in your niche. Notice their thumbnail style. You don’t need to copy them, but you should understand what works in your space before breaking the rules.
Frequently Asked Questions
Do I need to pay for any of these tools? No — all the tools mentioned in this guide have a free tier. Microsoft Designer is completely free. Canva’s free plan gives you access to all the basic features you need. Adobe Firefly gives you a set of free credits each month. You can create professional thumbnails without spending a dollar.
What size should a YouTube thumbnail be? YouTube recommends 1280×720 pixels (16:9 aspect ratio) with a file size under 2MB. Canva’s YouTube Thumbnail template sets this size automatically. Always use PNG for the sharpest quality.
Can I use AI-generated images on YouTube? Yes, you can use AI-generated images in your thumbnails. YouTube doesn’t prohibit AI-generated artwork. However, if your video content itself was significantly AI-generated, YouTube recommends disclosing that in the video settings.
How long does it take to make a thumbnail this way? Once you’re comfortable with the tools, you can make a solid thumbnail in 10–15 minutes. The first time will take longer as you explore the interface and experiment with prompts. By your third or fourth thumbnail, you’ll have a rhythm and a template that makes it even faster.
What font should I use in my thumbnails? Bold, heavy fonts work best for thumbnails. Great choices in Canva include Anton, Impact, Bebas Neue, and Montserrat Bold. Avoid thin or script fonts — they’re very hard to read at small sizes. Stick to white or yellow text, since they show up well against almost any background.
Can I make thumbnails on my phone? Yes! Both Canva and Microsoft Designer have mobile apps. The Canva app is particularly good for thumbnail editing on the go. The process is essentially the same — generate your image, upload it to Canva, add text, and download.
My AI image doesn’t look right — what should I do? Try regenerating with a more specific prompt. Add words like “photorealistic,” “high quality,” “professional photography,” or “8K resolution.” It usually takes 2–4 tries to get something you love.
Conclusion
Creating a great YouTube thumbnail used to require expensive software and design skills. Not anymore. With free AI tools like Microsoft Designer and Canva, anyone can make a thumbnail that looks polished, professional, and click-worthy — even on their first try.
The formula is simple: a strong image, bold readable text, and a clear message. Start with one video, make your thumbnail, and see how it performs. Tweak it, test it, and get better each time. Your click-through rate will thank you.